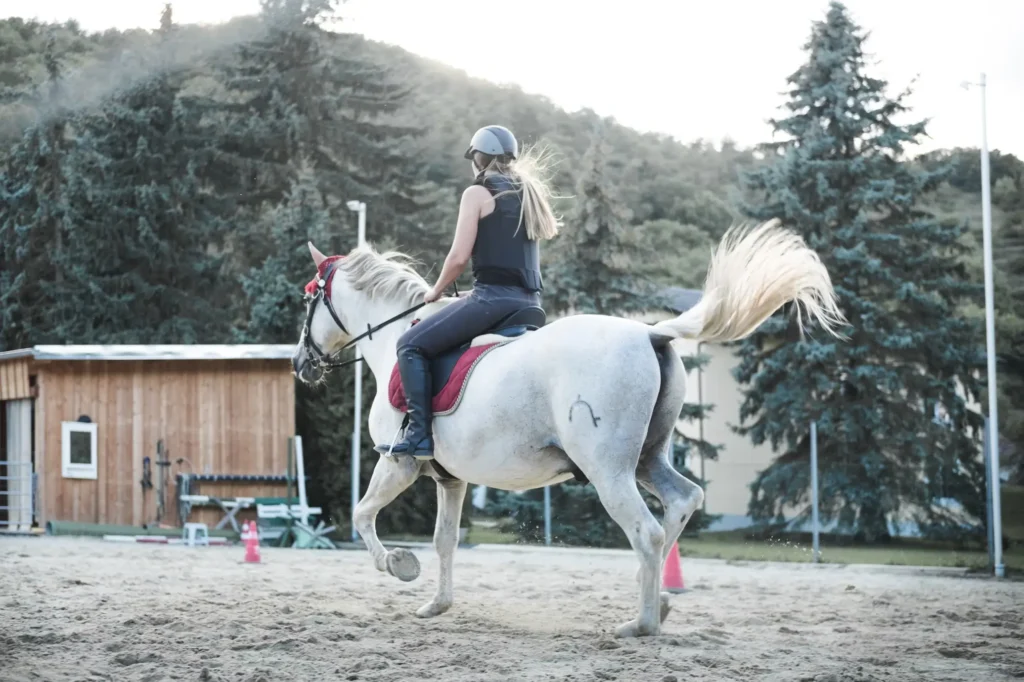
The piaffe, is a collected movement where your horse shifts from one diagonal to another in a majestic trot. Considered the pinnacle of dressage, the piaffe demands a lot of strength and synchronized movement while maintaining a relaxed look. With extensive practice and sufficient time to build his confidence, your horse can master it.
Begin slowly with your horse in hand and then practise the piaffe while riding as your horse gains more confidence with his movements.
Table of Contents
Here are the steps to follow when introducing the piaffe:
How to Train a Horse to Piaffe: Preparation Tips

In a well-executed piaffe, your horse should look like he’s trotting on the spot with his hind quarters lowered while the forehand remains light.
It’s a difficult movement to teach, so your horse needs to be proficient in basic dressage movements before embarking on the piaffe. He should be calm as you ride him and capable of trotting and halting with little effort.
Ensure you understand your horse’s temperament– it will determine whether you use gradual or accelerated training.
How to Train a Horse to Piaffe: Practicing with Your Horse in Hand
Step 1: Start with tapping exercises
If you’re familiar with your horse, then you know which part of his hind leg to tap when you want a quick response.
Start by standing on one side of your horse with a firm grip on his reins. The way you move his reins will help communicate the movements you need to perform the piaffe. A horse whip will come in handy when guiding your horse, as will treats like apples or biscuits to reward any correct movement.
Tap on one of your horse’s legs with the whip as a signal for him to lift up that particular leg. When he complies, reward him with a treat. Continue to practicing this movement, switching between one hind leg and the other one. Once he’s able to lift up each leg in succession, reward him again with a treat.
Now try switching movement from one front leg to the other one in succession. If manages to do this well, treat him again.
Step 2: Try half steps
Half steps are a small contained jog that improves your horse’s balance. Start by asking your horse for short but active steps using his hind legs.
By doing this, your horse will learn to:
- Close his hind leg under the body in a forward position
- Bend his hind legs more energetically
- Lower his croup
When practised in hand, half steps create less strain on your horse’s joints and muscles compared to training under saddle. That’s because he’s supporting only his own body weight. It’s also a good way to prepare him for later training under saddle.
Once he is successful walking and lifting each leg higher and forward in response to the whip, treat him and allow him to rest.
Step 3: Speed up the half steps
With time your horse will get comfortable doing half steps. Now get him to speed up his movement by tapping him on the hind legs, one leg after the other, in quick succession. Introduce more half-halts on the reins to discourage your horse from breaking into a full forward trot.
Maintain a higher tempo on the half-halts and keep them light, but avoid the temptation to pull on his bit as this will unnerve him. Gradually increase the speed until your horse produces a few jog steps with his hind legs.
With time he will know the objective isn’t to jog away but to trot on the spot, and will start gaining some rhythm in his front legs as well.
By effectively employing the two aids – reins to encourage half halts from your horse, and a tapping whip to speed up his hind legs into a trot rhythm – you will successfully achieve half steps. Practice these half steps until he starts to piaffe.
Always remember to build his confidence and understanding as you practise to avoid being kicked at or towed around by your horse. Remember, don’t be overambitious; if he produces a few neat steps, reward him and end the session.
How to Train a Horse to Piaffe: Doing the Piaffe in the Saddle
Step 1: Practise halting.
Begin your training by asking your horse to halt. Try sharp, smooth halts, followed by collect trot departs. Use the reins as aids to tell your horse when to halt and when to trot. Check how calm your horse is when practicing the trot-halt transitions and how balanced his movements are.
Step 2: Trot on the spot.
Once he’s comfortable halting and trotting, try trotting on the spot.
Start by decreasing the number of strides taken between trot-halt transitions, while also working on shortening his strides. Remember to loosen your grip on the reins and not to tug at them suddenly, as this will only create unnecessary tension.
When your horse begins to slow down and his strides are shorter, ask him to do two or three consecutive strides on the spot before moving forward again. Try this move only when he’s calm and relaxed, and make sure you treat and praise him whenever he offers positive movement.
End your session and give your horse a rest.
Step 3: Try diagonal walking on the spot.
Once your horse’s walk is energetic, and his trot and stride are fluid, you will know he is ready for this final step. It’s important to be light and relaxed in the saddle for easier training of this skill.
Try getting your horse to move diagonally on command while executing the piaffe. Begin by asking him to do a short trot followed by two to three fluid strides, then let him move on his own while holding the reins loosely. This will allow him to stretch his neck.
It’s always helpful to have an extra hand to guide your horse’s hind legs by lightly tapping on them with a whip as he moves.
Check our articles today and get ready to experience more Training & Riding Tips.

